Getting Started with Inventory
Step-by-step walkthrough from adding your first material to tracking stock and usage.
This guide walks you through setting up inventory tracking on your project — from adding your first material to logging deliveries and tracking consumption.
- Add approved materials with budget rate and planned quantity
- Set up vendors in the Vendors tab
- Log deliveries as materials arrive → stock increases
- Log usage as materials are consumed → stock decreases
Before You Begin
Prerequisites
- Your project needs approved materials through the Material Submittals workflow
- You need Engineer role or above to manage inventory
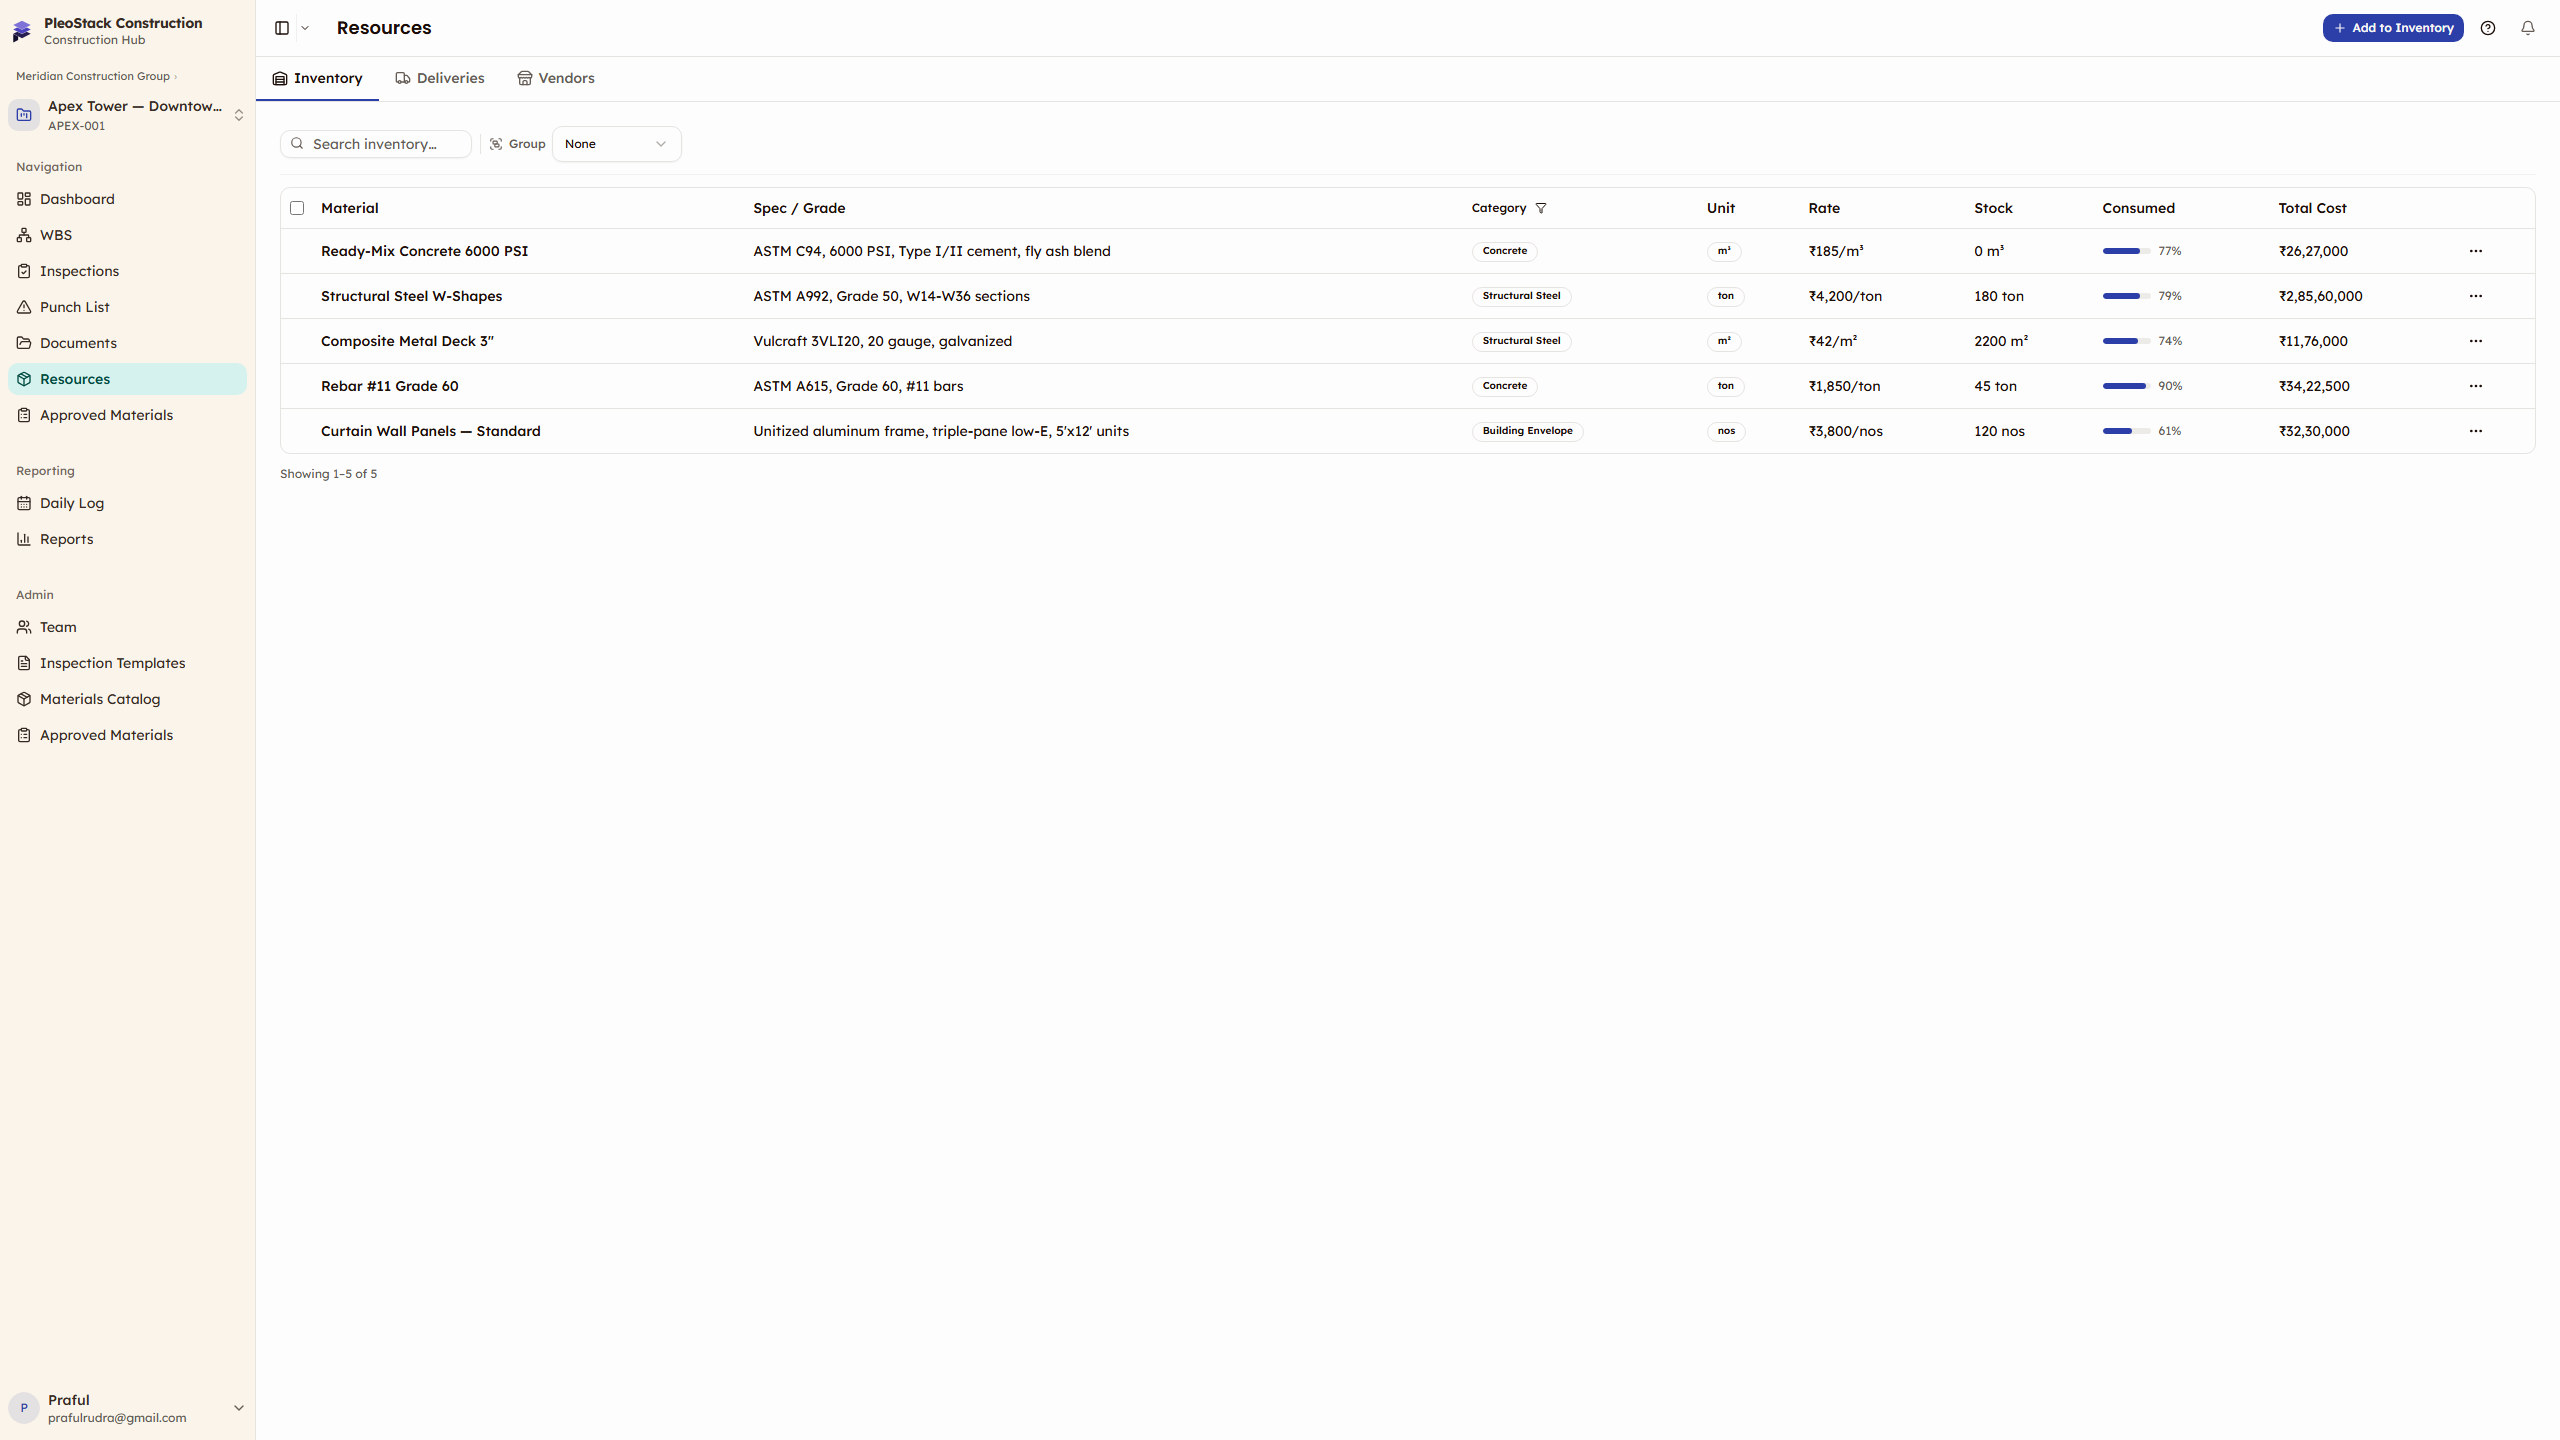
- Open Resources from the sidebar → make sure you're on the Inventory tab
Here's what the Resources page looks like when you open it — the Inventory tab is selected by default:
Add Your First Material
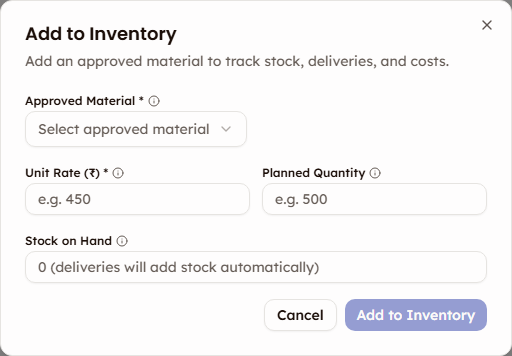
- Click Add to Inventory in the toolbar (top-right)
- Select a material from the Approved Material dropdown — this list comes from your project's approved Material Submittals
- Once you select a material, the category, unit, manufacturer, and approved suppliers auto-fill from the submittal
- Enter the Unit Rate (₹) — your budgeted cost per unit
- Optionally set Planned Quantity (how much you expect to need for the project) and Stock on Hand (if material is already on-site before tracking)
- Click Add to Inventory
Your material appears in the inventory table. If you entered stock on hand, it shows immediately. Otherwise, stock starts at zero and builds as deliveries arrive.
Why Only Approved Materials?
This ensures every material on your project has proper documentation, specifications, and approval — no unofficial materials can slip into your inventory.
Set Up Your Vendors
Before logging deliveries, add the suppliers who'll deliver materials:
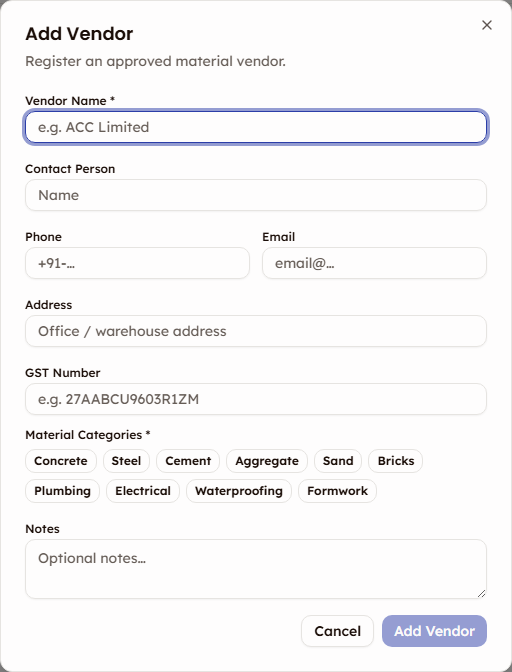
- Switch to the Vendors tab
- Click Add Vendor
- Enter the Vendor Name and select the Material Categories they supply (e.g., Concrete, Steel, Cement)
- Add contact details — contact person, phone, email, address, and GST number (all optional)
- Click Add Vendor
Vendors are now available in the delivery form. When you log a delivery, the vendor dropdown filters to show only vendors approved for that material's category.
Log Your First Delivery
When materials arrive on-site:
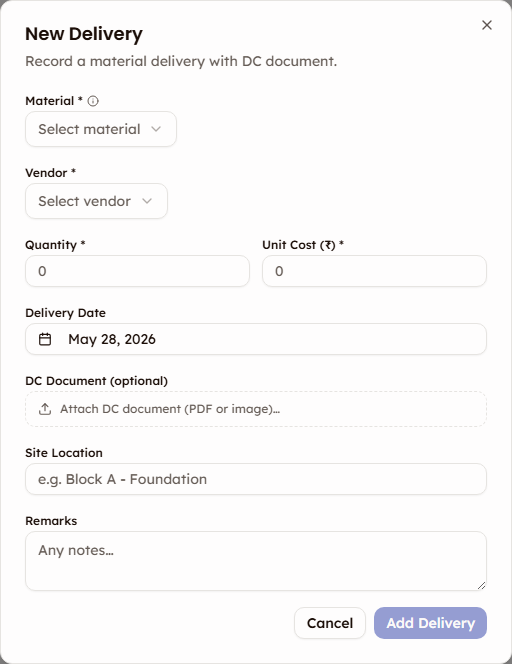
- Switch to the Deliveries tab
- Click New Delivery
- Select the Material — the dropdown shows materials already in your inventory, plus approved submittals not yet added
- Select the Vendor — filtered to vendors approved for the material's category
- Enter the Quantity and Unit Cost (₹) — the total cost previews automatically
- Set the Delivery Date (defaults to today)
- Optionally attach a DC Document (delivery challan PDF or image), add a Site Location (e.g., "Block A - Foundation"), and any Remarks
- Click Add Delivery
The delivery starts as Pending. Once reviewed and approved, the quantity is added to your stock.
Track Usage
As materials get used on-site:
- Go back to the Inventory tab
- Find the material in the table and click the actions menu (⋮) on the right
- Select Log Usage
- The Material is pre-selected — enter the Quantity Consumed
- The Date defaults to today — change it if you're logging past usage
- Optionally add Remarks for context (e.g., "Foundation pour Block A")
- Click Log Usage
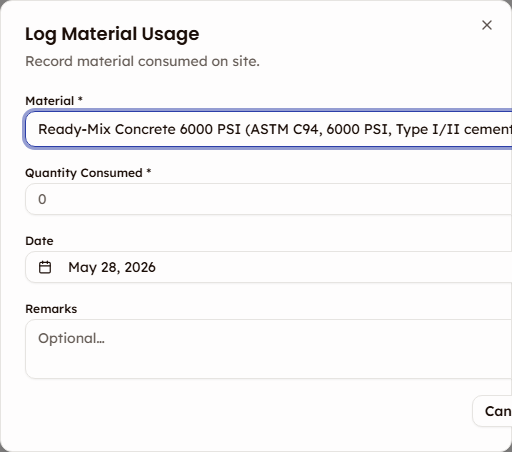
Stock decreases immediately. The Consumed progress bar updates to show how much of your planned quantity has been used.
What to Watch For
Alerts
- Low stock alerts — appear when stock drops below 10% of your planned quantity. Time to reorder.
- Over-budget warnings — appear when total delivery costs exceed your budget (rate × planned quantity). Review your spending.
- Manual adjustments — for situations outside normal delivery/usage flow. Pre-existing inventory on site, material damaged during monsoon, recount corrections, or transfers from other projects. Use the Adjust Stock action.
You're Set Up
Your inventory is now tracking. As your project progresses:
- Log deliveries as materials arrive → stock increases
- Log usage as materials are consumed → stock decreases
- Monitor progress bars and alerts → stay ahead of shortages and budget overruns
Next Steps
- Adding Materials — Detailed guide with all form fields
- Stock Tracking — How the formula works, alert thresholds
- Usage Logging — Best practices for tracking consumption