Getting Started with Deliveries
Step-by-step walkthrough from logging your first delivery to tracking arrivals and costs.
This guide walks you through logging your first delivery — from selecting the material and vendor to attaching a delivery challan and tracking costs.
- Click New Delivery → select material and vendor
- Enter quantity, unit cost, and delivery date
- Optionally attach a delivery challan (DC) document
- Click Add Delivery — stock increases automatically
Before You Begin
Prerequisites
- Your project needs materials in Inventory (or approved through Material Submittals)
- You need vendors set up in the Vendors tab
- You need Engineer role or above to log deliveries
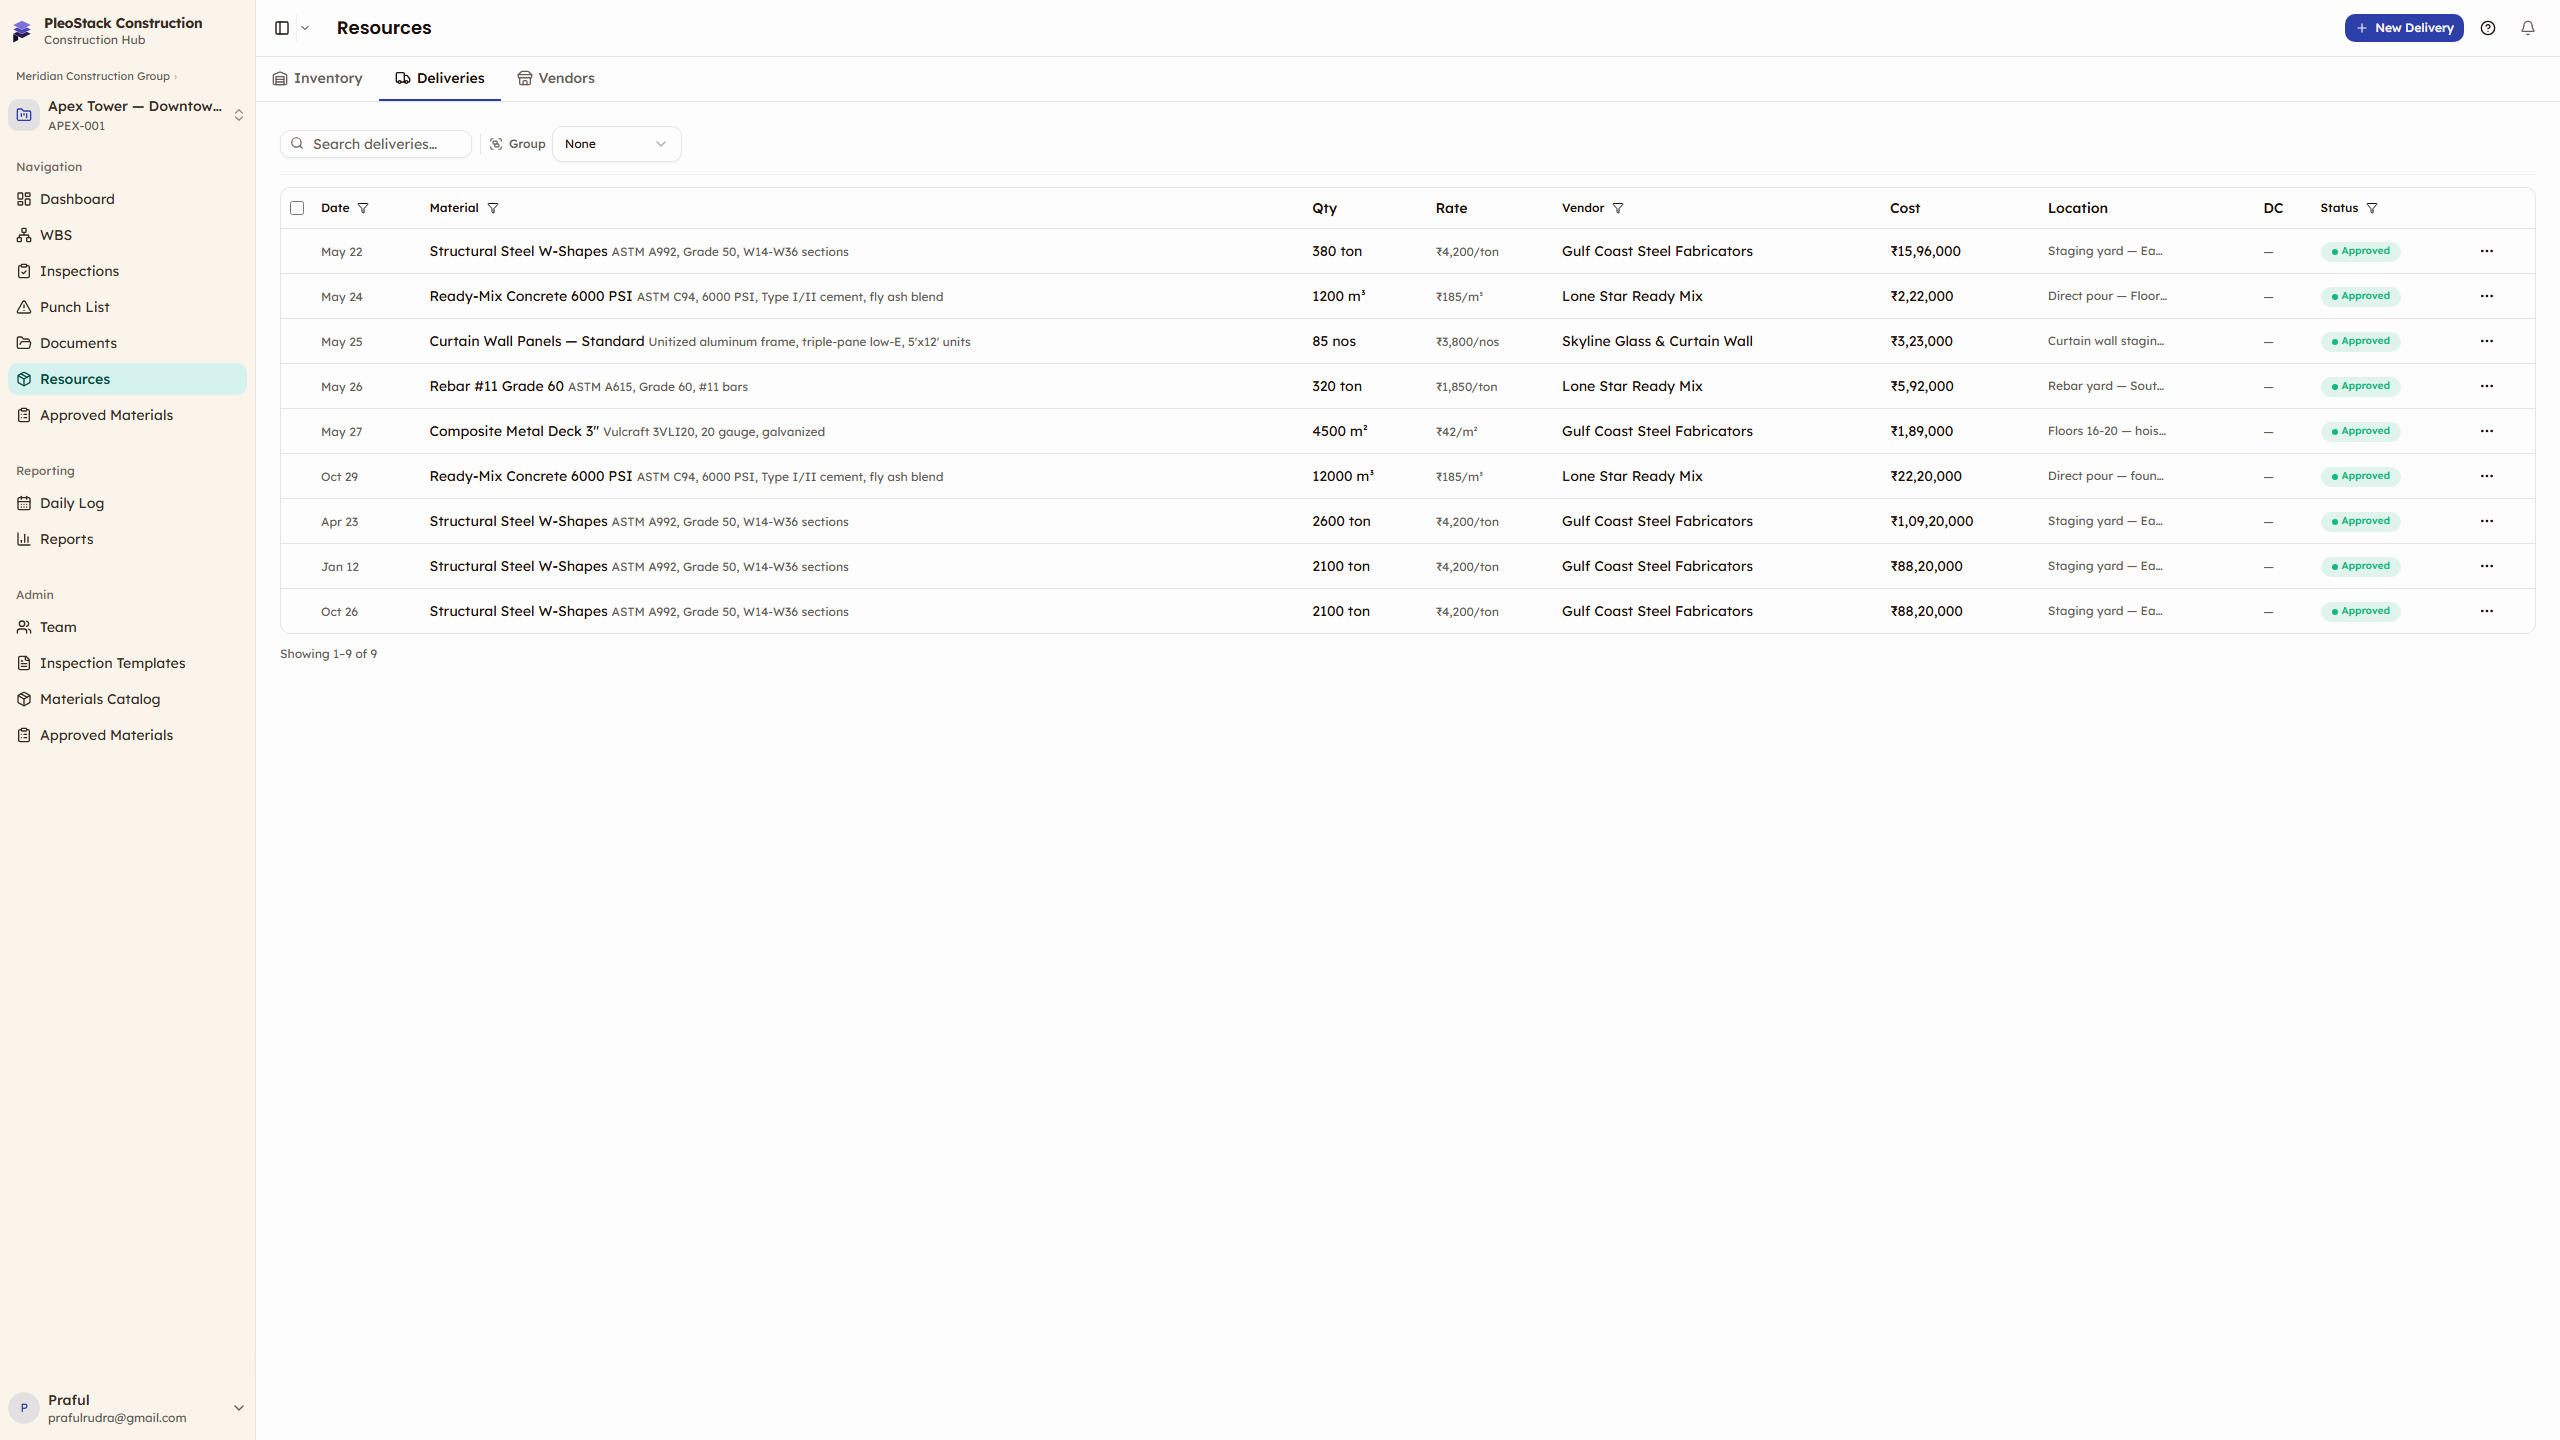
- Open Resources from the sidebar → switch to the Deliveries tab
Here's what the Deliveries tab looks like — a chronological log of every material arrival on your project:
Open the New Delivery Dialog
Click New Delivery in the toolbar (top-right). The dialog opens with fields for material, vendor, delivery details, and an optional document upload.
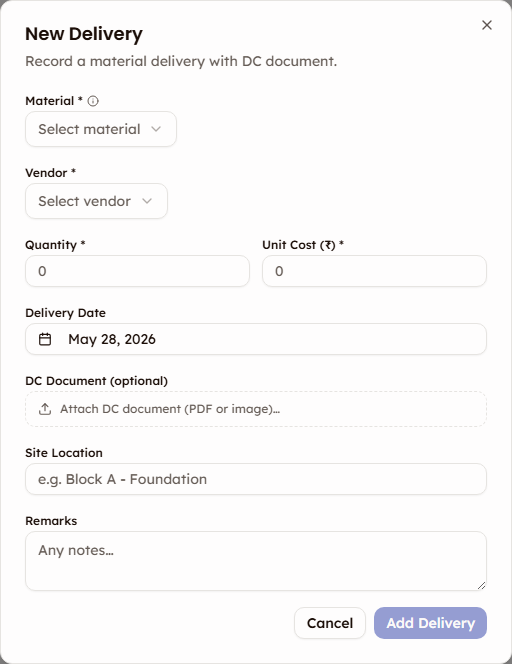
Select Material and Vendor
- Select the Material from the dropdown — it shows two sections:
- In Inventory — materials you're already tracking
- Approved Materials (not in inventory) — submittals that haven't been added to inventory yet. Selecting one of these automatically creates the inventory entry for you.
- Select the Vendor — the dropdown automatically filters to vendors approved for the selected material's category. If the material has no linked vendors, all active vendors are shown.
Auto-Inventory Creation
If you select a material from "Approved Materials (not in inventory)", the system creates the inventory entry and links the delivery in one step. The button text changes to Add to Inventory & Record Delivery.
Enter Delivery Details
- Enter the Quantity delivered (supports decimals)
- Enter the Unit Cost (₹) — the cost per unit for this specific delivery
- The Total Cost previews automatically (quantity × unit cost) above the save button
- Set the Delivery Date — defaults to today, change if logging a past delivery
- Optionally:
- Attach a DC Document — upload the delivery challan (PDF, JPG, PNG, or WebP)
- Add a Site Location — where on-site the material was delivered (e.g., "Block A - Foundation")
- Add Remarks — any additional notes about the delivery
Save the Delivery
Click Add Delivery (or Add to Inventory & Record Delivery if the material wasn't in inventory).
The delivery is saved and appears in the table. The system assigns its approval status automatically — currently all deliveries are approved immediately, so the quantity is added to your inventory stock right away.
What to Watch For
After Logging
- Stock updates immediately — check the Inventory tab to see the new stock level
- Total cost in the Inventory tab increases by this delivery's cost
- DC documents are linked to the delivery — click the DC column link to view them anytime
- If the vendor isn't approved for the material's category, the system may flag the delivery
You're Tracking Deliveries
Every material arrival is now logged with full cost and vendor traceability. As deliveries come in:
- Log each arrival → stock increases automatically
- Attach delivery challans → documents are linked for audit
- Filter by vendor or date → review supplier performance
Next Steps
- Logging Deliveries — Detailed guide with all form fields
- Delivery Status — What Approved, Flagged, and Pending mean
- DC Documents — Best practices for delivery challans