Logging Deliveries
How to record a material delivery with the New Delivery dialog — all fields and options.
- Click New Delivery in the toolbar
- Select Material — from inventory or approved submittals not yet in inventory
- Select Vendor — filtered to approved vendors for the material's category
- Enter Quantity and Unit Cost (₹) — total cost previews automatically
- Set Delivery Date (defaults to today), optionally attach a DC Document, add Site Location and Remarks
- Click Add Delivery — delivery is logged and stock increases immediately
Full Guide
The New Delivery Dialog
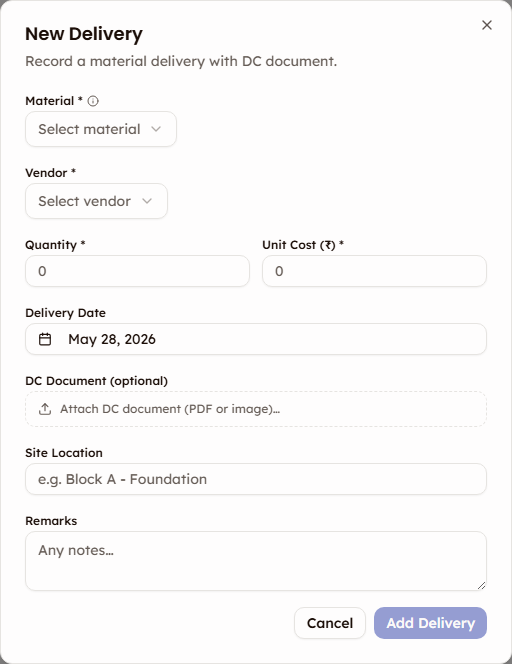
When you click New Delivery, the dialog opens with these fields:
| Field | Required | Description |
|---|---|---|
| Material | Yes | Dropdown with two sections: "In Inventory" and "Approved Materials (not in inventory)" |
| Vendor | Yes | Dropdown filtered to vendors approved for the material's category |
| Quantity | Yes | Amount delivered in the material's unit (supports decimals, minimum 0.001) |
| Unit Cost (₹) | Yes | Cost per unit for this delivery (supports decimals) |
| Total Cost | — | Auto-calculated preview: quantity × unit cost (shown before saving) |
| No | Calendar picker, defaults to today | |
| DC Document | No | File upload — accepts PDF, JPG, PNG, WebP |
| Site Location | No | Where on-site the material was delivered (max 200 characters) |
| Remarks | No | Additional notes about the delivery (max 1,000 characters) |
Material Selection — Two Sections
The material dropdown shows two groups:
In Inventory — Materials you're already tracking. Selecting one of these links the delivery to the existing inventory entry.
Approved Materials (not in inventory) — Submittals that have been approved but not yet added to your inventory. Selecting one of these:
- Automatically creates an inventory entry for the material
- Links the delivery to the new entry
- The button text changes to Add to Inventory & Record Delivery
Shortcut
This is a convenient shortcut — instead of going to Inventory → Add to Inventory first, you can create the inventory entry and log the first delivery in a single step.
Vendor Filtering
When you select a material, the vendor dropdown filters automatically:
- If the material has approved vendors defined (via Material Submittals), only those vendors appear
- If no approved vendors are defined, all active vendors are shown
- Suspended and Removed vendors are never shown
Total Cost Preview
As you enter quantity and unit cost, the total cost preview updates automatically above the save button:
Total Cost = Quantity × Unit Cost
This helps you verify the numbers before saving.
Good Remarks Examples
Remarks add context that helps during audits and reviews:
- "Scheduled delivery — PO #4523"
- "Partial delivery — remaining 50 tonnes expected next week"
- "Emergency order — rate premium approved by PM"
- "Replacement for rejected batch — no additional cost"
- "Delivered to secondary storage — Warehouse B"
What Happens After Saving
- The delivery appears in the Deliveries table with a status badge
- Approved deliveries add the quantity to your inventory stock immediately
- The material's Total Cost in the Inventory tab increases by this delivery's cost
- If you uploaded a DC document, it's linked to the delivery record
Related
- Delivery Status — How statuses affect your stock
- DC Documents — Uploading and managing delivery challans
- Inventory Overview — How deliveries feed into stock tracking